How to Select on an Element TV Without a Remote
Last Updated on November 4, 2023 by Jhonni Jets

Element TVs provide great quality and features at an affordable price point. However, if you’ve lost your Element TV remote or it stopped working, it can be tricky to control certain functions like selecting menu options. Thankfully, there are several methods to select on an Element TV even without the original remote.
In this comprehensive guide, we will explore multiple ways to mimic a remote and select options on an Element TV. The techniques below work for most models and only require using the built-in TV buttons or a universal remote.
Table of Content
After reading this guide, you’ll be able to easily navigate and control an Element TV without pulling your hair out over a lost or broken remote. Let’s dive in!
Step 1: Locate Your Element TV’s Built-In Control Buttons
Modern Element TVs have physical buttons built directly into the TV itself that provide some basic functionality, including navigating the on-screen menus.
These buttons are typically located on the lower right side of the TV’s rear panel or on the left/right side of the TV near the bottom.
Check around the edges of your Element TV to find the panel with the control buttons. There should be a power button plus buttons with left, right, up, down arrows.
Use these built-in physical buttons to control your Element TV if no remote is available.
Step 2: Power On the Element TV
The first step is obviously to power on the Element TV, since nothing else will work if the TV is off!
Press and hold the power button on the built-in Element TV control panel for 3-5 seconds.
Wait for the TV to fully boot up and display the home screen. This may take 30-60 seconds.
Once powered on, you can move on to using the control buttons for navigation.
Step 3: Access the Settings Menu
To select specific options, you first need to call up the settings menu on the Element TV.
Find the menu or settings button on the built-in button panel. It likely has a picture of menu bars or looks like 3 horizontal lines.
Press and hold this menu button for a few seconds to bring up the full settings menu. It usually slides in from the right side.
Use the arrow buttons to scroll up and down through the settings options. Press the center button to select an option.
Note that the built-in buttons may not access every single setting and submenu. But you should be able to access at least picture, sound, and input selection using this method.
Step 4: Adjust Key Element TV Settings
Once the settings menu is displayed, the button controls can adjust key options like:
Picture Mode – Change between preset picture modes like Movie, Standard, Vivid, Sports, etc.
Sound Mode – Switch between sound presets like Theater, Music, Standard, etc.
Input – Change the displayed input from HDMI 1 to HDMI 2, etc.
Use the arrow buttons to highlight the desired setting, then press the center button to select it. Exit back after adjusting.
Without a remote, the built-in controls may not offer total access to picture calibration and audio tweaking. But you can select from various preset modes.
Step 5: Reset Picture and Audio Settings
If the picture or sound settings seem totally incorrect and you need to start fresh, most Element TVs allow resetting everything back to factory defaults.
To do this:
- Access the settings menu using the built-in buttons as described in Step 3.
- Go to either the picture or audio settings (depending on which needs reset).
- Scroll down to find the “Reset” option.
- Confirm the reset to restore that setting category to defaults.
Once reset, you can adjust basic modes like switching from Vivid to Standard picture. This acts as a fresh slate if settings were botched.
Step 6: Change Inputs and Select Connected Devices
Using the built-in buttons, you can change to different HDMI inputs and AV sources connected to your Element TV.
For example, to switch from a cable box on HDMI 1 to a Blu-ray player on HDMI 2:
- Call up settings menu using the built-in buttons.
- Select the Inputs option.
- Change from HDMI 1 to HDMI 2 input.
- Press center button to confirm selection.
This will display the video input from the Blu-ray versus the cable box. Useful for accessing different connected devices.
Step 7: Adjust Closed Captioning Settings
Besides basic picture and sound adjustments, Element’s built-in controls also allow adjusting closed captioning options:
- Access the settings menu using the buttons.
- Scroll down and select Closed Captioning or CC options.
- Toggle Closed Captioning On or Off.
- Change CC size, style, color, and opacity settings.
This is helpful for controlling closed caption viewing if needed for accessibility purposes.
Step 8: Update Software Version
If your Element TV needs a software update, you can still initiate it without a remote using the built-in controls:
- Call up the settings menu.
- Scroll down and select System > Check for Updates.
- If an update is found, select Download and Install.
- Let the TV process the update, which may take 15-30 minutes.
Software updates often improve performance and fix bugs, so it’s worth updating an Element TV even without remote capabilities.
Alternative Ways to Control Element TV Without Remote
In addition to the built-in button controls, there are also a few other alternative methods to control an Element TV:
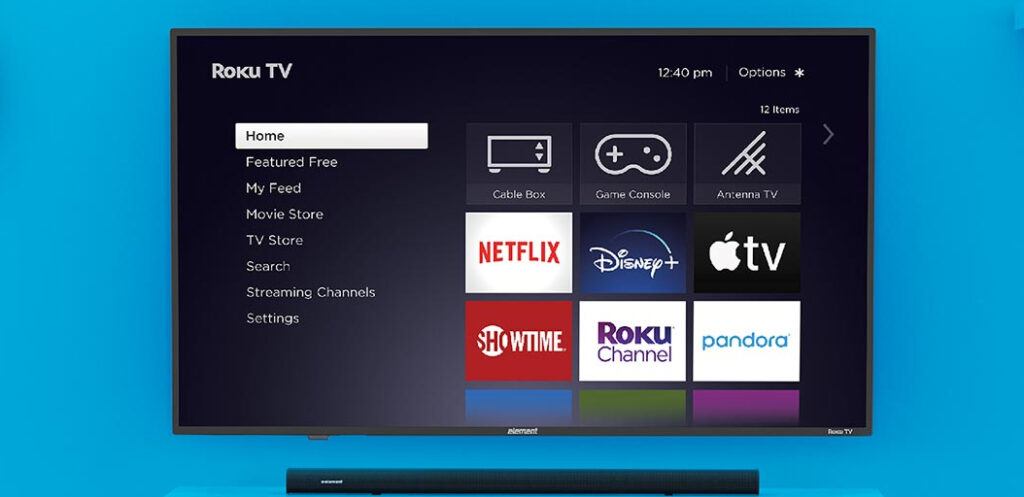
- Mobile App – Element Roku TVs can be controlled via the Roku app. Provides touchscreen remote functionality.
- Voice Assistant – Use Alexa or Google Assistant connected to Element TV for voice commands. Can launch apps, switch inputs, etc.
- Universal Remote – An affordable universal remote can sync and work with Element TV models. Lets you fully control interface again.
- Smart Home Hub – If you have a smart home hub like Samsung SmartThings, it may support basic commands and controls for Element TVs.
These options provide other ways to get select functionality from your Element TV without the stock remote control.
What to Do if Built-In Buttons Don’t Work
In some cases, the built-in physical buttons on an Element TV may not be functioning, especially if the unit is older. Try these last resort troubleshooting tips:
- Press buttons firmly and hold for several seconds at a time. They may need an extra forceful press to engage.
- Use a paperclip or pin to press the built-in buttons. This can dislodge any dirt or debris.
- Unplug the TV power cable and press the buttons a few times to discharge static.
- As a last resort, the buttons can be taken apart, cleaned, and re-soldered internally if damaged. Requires electronic skills.
- Acquire a replacement remote if available from Element’s parts department. Low cost fix.
While built-in buttons not working is rare, these steps may get them functioning again as a backup control option.
Enjoy Your Element TV Sans Remote
And with that, you are fully equipped to effectively control and configure an Element TV even without the standard remote control! The built-in physical buttons provide basic access to picture, sound, input, and menu selections.
Combined with alternative options like mobile apps, voice assistants, and universal remotes, you should be able to retain strong functionality from your Element TV. Never let a lost or broken remote interrupt your viewing experience again.
So use these techniques to keep your Element TV running smoothly no matter what happens to your remote. Power on, select inputs, adjust settings, and enjoy watching TV using the tools available on the TV itself. Have fun exploring everything you can do even without a remote!


